Get the body you want using Visible Body layers

Exploring the different systems within the body and their relationships to each other is as simple as eating ice cream with a spoon using Visible Body. Start by selecting the area of the body that you want to concentrate on and then use the vertical menu in the left hand column to turn on different “system layers”.
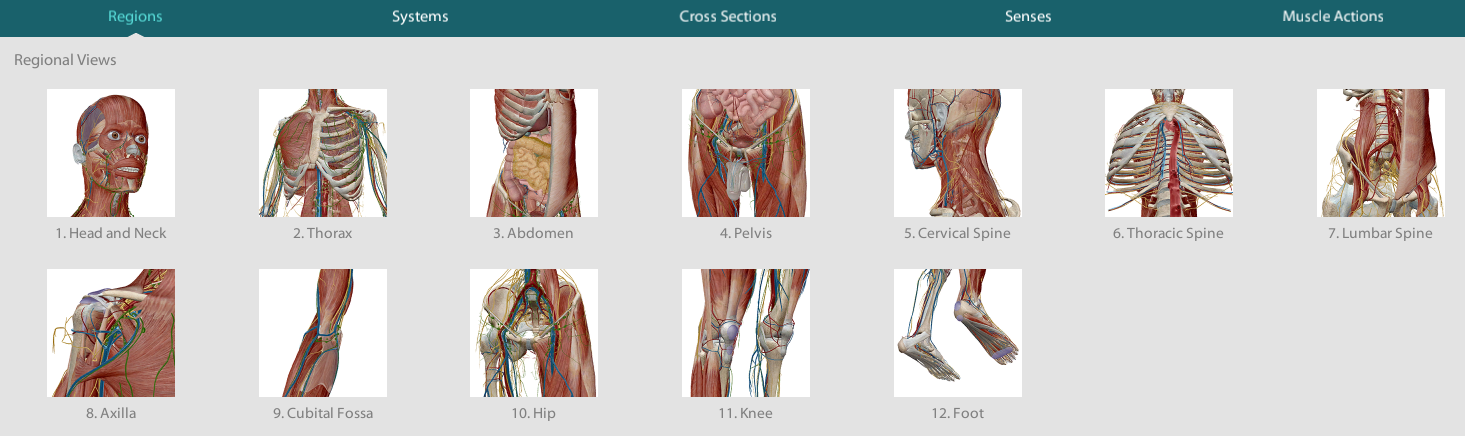
Below is a screenshot of the “Regions” menu from the horizontal green menu at the top. In this example we will select the thoracic spine.
System Layer Menu
Here is a screenshot from the Thoracic area with all layers turned off but skeletal. Blue icons in vertical menu bar on the left indicate which layers are selected.
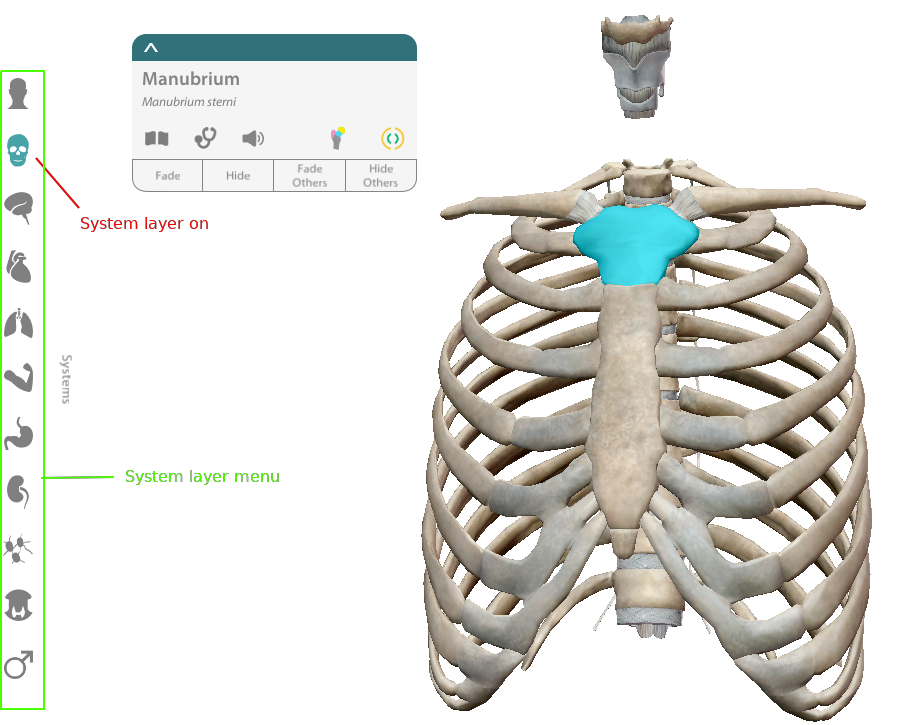
Below, I have labelled the icons from the vertical menu to give you an idea of the layers available in Visible Body.

Label Menu
Selecting a body part from the model will bring up a label menu with the name of the object selected and several options for learning about the selected part and exploring the area.

The book icon on the label menu will give you a brief description of the selection while the speaker icon to the right of the book menu will give you the correct way to pronounce the item.
There are five icon options in the middle of the menu. The first three are consistent across different views. The three icons (listed in order from left to right) are:
- Definitions - a basic and brief overview of the selected object
- Pathologies - this option lists several of the problems associated with the selected body part. Selecting an item from the Pathologies menu will give you a brief definition of that issue.
- Pronunciation - Gives an audio clip with the proper pronunciation of the selection.
 |
| Definitions Menu Example |
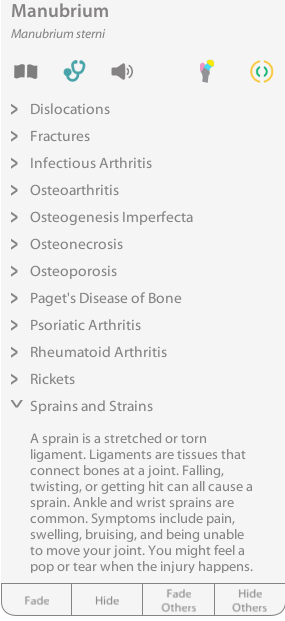 |
| Pathology Menu Example |
Layer Manipulation Options
The model can be manipulated in a number of ways to get the exact view that you want. You can zoom in or out on an object using the scroll wheel on your mouse. You can also change the orientation of the view with a left button click on the model. Holding down the button and dragging will allow you to rotate the object 360 degrees horizontally or vertically.
Additional customization is available using the options at the bottom of the label menu. These options allow you to adjust the visible layers so that you can get a better view of objects that might be obscured by outer body parts.
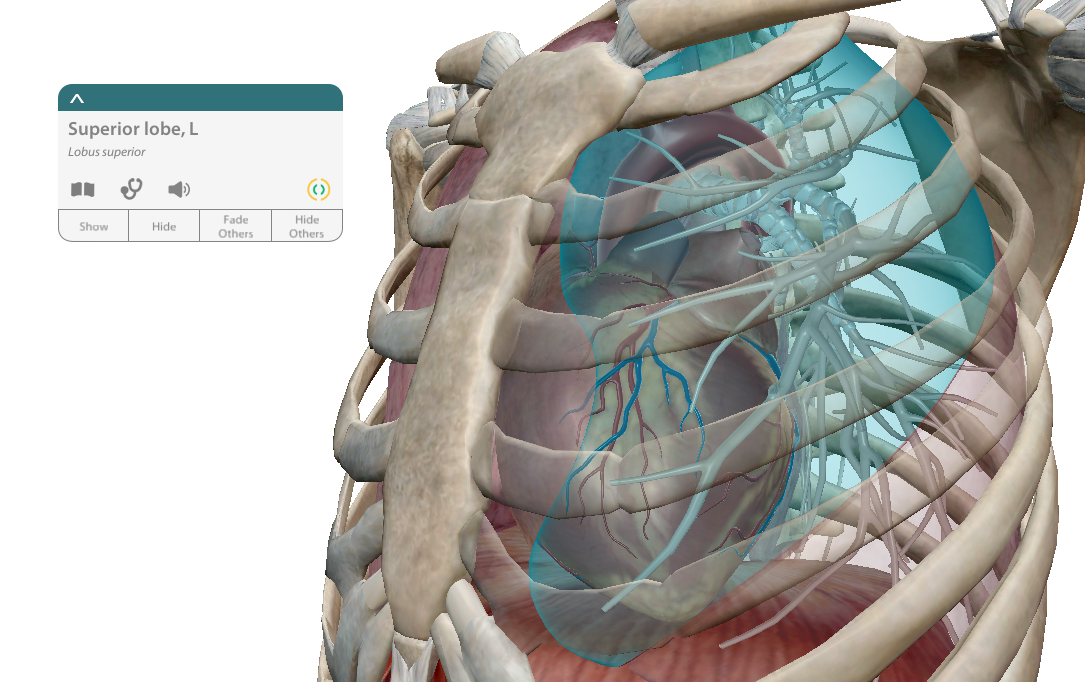
The fade button allows you to make a selection translucent. The selection can still be seen, but object behind the selection are now appear more clearly.
In the example below the Superior lobe has been selected and the “fade” has been turned on to show the heart and other internal organs. This is a toggle button. Once an item has been selected the option will change from “fade” to show.
Items that have been selected using the “Hide” option will disappear from the screen. This can be helpful in situations where the fade option does not clearly show an interior element. Once hidden though an item cannot be brought back.
The example below shows the same view as above except that several elements including some ribs and the left Superior lobe have been hidden.

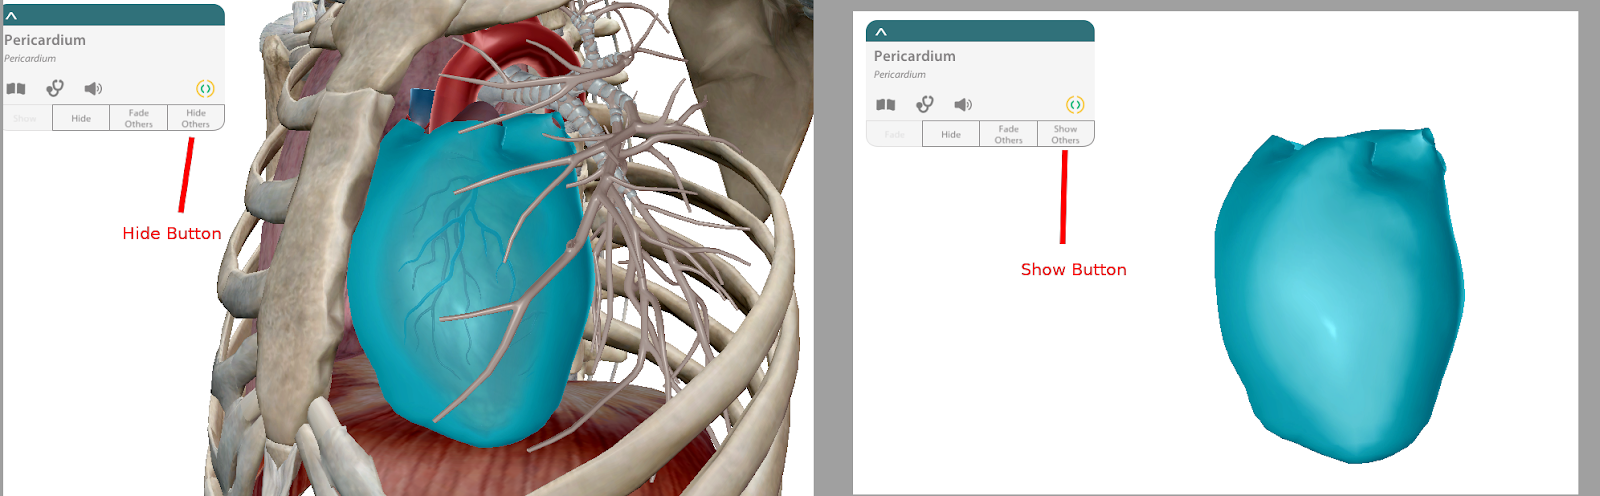
The last two items on this menu also fade or hide, but they allow you to do an inverse selection. You might use this if you wanted to quickly isolate a part and examine it.
Below is a side by side screenshot showing an item before and after the “Hide Others” option was selected. It can be toggled back to show everything by selecting “Show Others”.
Layer Slideshow
Here is a slideshow illustrating the various system layers as they are turned on.